What does it do dear readers? Today I'm going to walk you through making your own playing card gift boxes. You can make the boxes in a variety of sizes and styles and can use them to store a variety of things.
What you'll need:
 Playing cards. That's it actually. There are a ton of brands, with a ton of styles. You can get a deck of cards for as little as 1 dollar. These are some varieties I have on hand. Some you would have to order, some you can find in stores. Just check around and see who has what, where.
The major factor is what the back of the cards look like. Most cards made by the United States Playing Card Company have similar faces.

Your box is going to be made of what we'll refer to as WALLS joined together by CONNECTORS.
To construct a wall you need 2 playing cards. For this tutorial I'm using Mavericks in red and Aviators in blue.
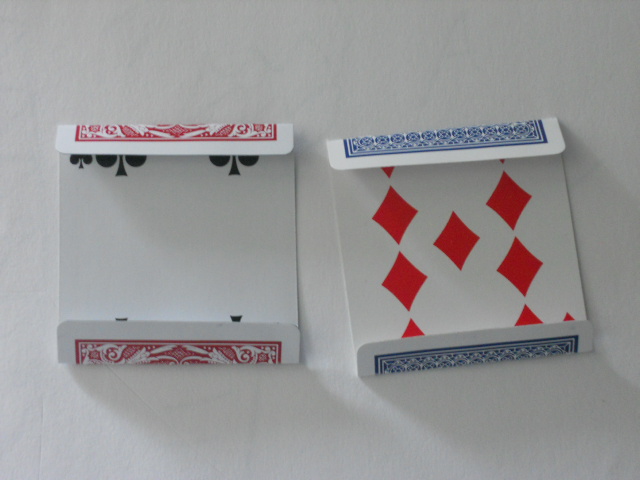
1. Arrange the two cards face to face as illustrated. If you would rather have a card featuring the face of a card (say the queens, kings or aces) face outward then have that card's back to the other card's face.

2. Fold the exposed ends of each card over the side of the other card like so. I usually try to keep the folds as even as possible but it's up to you. Keeping them even gives the box a more uniform appearance. You can look at the number on the face of the card as a reference point. When there is an equal amount of the number exposed on both sides it is okay to fold.

It will look something like this.
 You now have two halves.
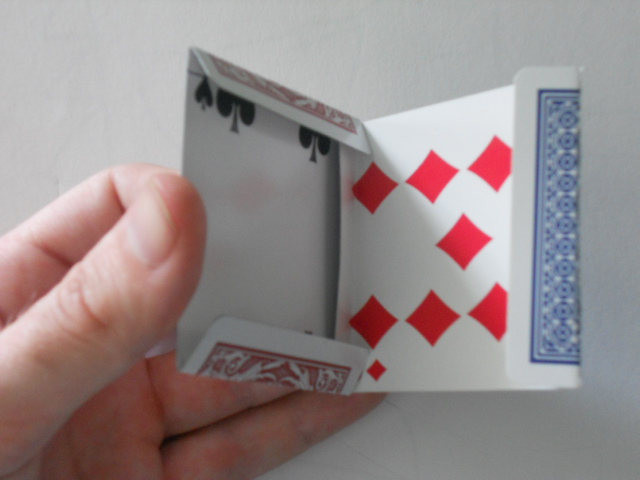
3. Insert the flap from one card into the flaps of the other card as shown.

4. Do the same with the other side of the flap.

You now have a WALL. For the box I'm making I'm using red backs for the inside and blue for the outside so all walls are red on one side and blue on the other.
5. Repeat steps 1-4 until have 6 walls total.

6. To create a CONNECTOR simply fold the card in half.

7. Insert one end of the connector into the slot of your wall like so.
A fine point about connectors: When your box is assembled you will notice the connectors are visible between the walls from the outside. This is another way you can customize your box. In the case of this box I used red backed cards as connectors with the face of the card facing inward. This will create a nice contrast on the outside of the box. If you'd like to have white connectors I suggest saving the 2s and 4s from your deck as connectors and folding them with the white side facing outwards.

8. ...then insert the other end into the other wall.

You now have two joined walls.

9. Repeat the process until you have 4 walls joined as illustrated. Notice I have the red walls facing inward and the blues outward. I also make a point to have all wall pieces in the same direction. In this case all the red walls run horizontally and all the blues run vertically. Again, do it however you'd like to.

10. The bottom is the least fun part to me. Take a wall and insert 2 to 4 connectors. I went with 4 for the sake of having the box look as uniform as possible but only 2 are necessary. Inserting 4 connectors can be a little tricky because the cards have to overlap inside the wall, just be patient. If it takes too long try yelling at it or spitting on it. Fire helps sometimes. Or peanut butter.

11. However many connectors you decide on you have to insert all of them into the square of walls at the same time. Push the bottom in flush and you are almost there!

12. Finally, make one more wall and connect it on one side to make your lid.

Your finished product will look something like this.

This is an example of a larger box I made with some other brands of cards. I use Tally Ho Circle backs and Bees for the interior and Bicycle Shadow Masters for the exterior.

Shadow Masters have a unique joker that looks like death so I had those facing outward at both ends.

I also made a handle of sorts for the top of the lid. It's done by folding a connector into 4ths, folding the two inside 4ths in half again, and uhh...it's kind of hard to explain. I think you can figure it out. If not, let me know I'll take a picture of it later.
These boxes make unique, thoughtful gifts. The impact is high while the cost is relatively low. I love making these for friends.
If you have any questions, thoughts or ideas to kick around let me know. I'll be doing a follow up on this project next week.
Neat trick. Are these sturdy at all? I think I'll use some really old Pokemon cards and try this out. I doubt it will look as good as yours, though. Cheers!
ReplyDeleteThey're actually pretty sturdy. You could always try it out and if doesn't seem solid enough as is, put a little glue on the connectors. I wouldn't say it's really necessary in most cases but it doesn't hurt anything.
ReplyDeleteIf you do make a box, take pics and let me know where I can see them. I'll post them up in my blog and link back to you. A pokemon box sounds pretty damn awesome.
This is pretty awesome. Time consuming but awesome.maybe for someone one day when I don't have another gift idea, or am short on cash o.o
ReplyDeletevery nice, would make an excellent container for pieces in diy board game :) i love the handle haha
ReplyDeleteD4-Yeah I think they can be a pretty good go to gift. Especially if you're on a budget because most decks of cards are 1-3 dollars.
ReplyDeleteElectric-Ahhhhh, good thinking sir. I've worked out a way of doing a small handle for single wide boxes but it's a little more involved. I'll get into it on my follow up.
Christmas sorted.
ReplyDeleteThat looks like a great box to store your playing cards in. ;)
ReplyDeleteWe offer the enchanting Playing card Boxes
ReplyDeletethat have actually been made to highlight your products and elevate your brand.